Showing posts with label Home Decor. Show all posts

Wednesday, February 24, 2016

LUCKY Blocks....Home Decor Project/Kit


So Are You Feeling LUCKY???

Well maybe you would if you picked up a set of my latest project kit.  These really easy, and really fun blocks will make a great Decor item in your home this
St. Patrick's Day.

Here is a look at the finished project:

KIT INCLUDES:
5 Unfinished wood blocks
1 Foam paint brush for paint or modge podge application
2 3x6 pieces of pattern paper (patterns vary)
1 set of Leather Letters
1 Wood Shamrock
Twine for decorating Shamrock

Pick up your Kit Today with the BUY NOW button below-it will ship in 2 days.


Tuesday, March 31, 2015

Cowboy Cutie Kit: Mini Album and Wood Decor

Cowboy Cutie Mini Album Kit

 Receive raw unpainted wood & foam brush to paint in your favorite color.
You can also use modge podge and adhere your favorite printed paper or cardstock.
 Create a 6x6 Mini Album with your pre-cut kit.
 Includes all of the Echo Park Paper and cardstock needed to complete this album.
 Use these pictures or follow along with an easy to follow PDF instruction guide.
 Preserve those pictures and journal your memories!


Boy Mini Album


Hope you enjoy making this project!

Thursday, September 25, 2014

Front Porch Makeover w/ Crafty Mesh Wreath

Autumn Blessings

 I created this Fall Wreath out of 4 types of Crafty Mesh-The Burlap colored one was my inspiration and I tied all of my colors back to that one.  All of my supplies for this wreath were purchased at Michael's and with all of their Fall items 50% off I spent only $27.00!!!
My Favorite is this little red basket that I stuffed with plastic bags to give the veggies a lift before I hot glued them into place.  Used some leaves and flowers and it makes a beautiful focal point.  I think it says Harvest-don't you?

 I also loved the glass beads that give this a nice twist.  I wrap this around the entire wreath and made sure all of the stems faced forward and around flower bunches I hot glued on.
 Once the Wreath was ready-I decided my porch needed a pick me up to match its beauty.
 So after a lot of washing and scrubbing-this is the blank slate I started with.
 The concrete was flaking and breaking off which made for a not so pretty look.  So I broke out my leftover spray paints and oops paint from Home Depot and started coming up with ways to spruce up the porch with not much money.
 My tired looking black mat & tan bench get an Oregano Spice makeover-they look wonderful now!!

 I used two can of spray paint for a whopping $7.00 cost-these puppies will look nice and new for another 2 years!!

 The oops paint was only $2.00!!! What a different $2.00 made-my porch looks brand new and the chipping concrete is now sealed in for a bit-I gave it 3 coats (2 quart cans).  If you really want it to last a clear cement sealer would be a good idea-but this will do for me for right now-we may do some stamped concrete eventually so for now this is just a cosmetic fix.

 I added some decorative touches-I will have a Cricut Scarecrow and some trim added to this table with a message to my friends/neighbors that come a calling.
 The new mat looks great and ready to take some more wear and tear.
 I found some fall decor items from my collection that seemed to work great outside-I will replace these with real pumpkins after a family trip to the pumpkin patch.

 My frumpy tired porch now looks ready for FALL Y'ALL!!!
These Cricut Explore cut babies will sit on the bench when its not raining-1 says Autumn and the other will say Blessings.  I made some fun/creepy ones for Halloween that I can substitute out when October arrives.
Had so much fun with this project-I hope you feel inspired to re-do some worn out pieces and give them new life around your home.
Thanks for visiting!!

Sunday, September 7, 2014

My Home Updates-Living Room & Bedroom

The Bedroom

 I love Sundays because after church our family loves to retreat to our own spaces and enjoy some quiet time-reading, and relaxing.
My hubby and I sometimes watch a movie (or a football game) but mostly we spend some time reading-talking-planning for the week ahead.
 When we moved we kept all of our large furniture  pieces but we decided to change all of our bedding and decor.  Since my new house had a really cool ceiling fan in a nice chocolate brown color I decided to add brown to our favorite color RED~!
The Formal Living Room
 We also sometimes have company come over for visits on Sunday so the first room I finished decorating  is our formal living room.
 This is the room that HAS TO stay clean-so of course it has all of my favorite things in it!
 I grew up in an Italian neighborhood in Boston, Massachusetts so of course I have a healthy appreciation for tchotchkes (trinkets).
 The 2 high back chairs are treasured finds-but the upholstery doesn't match the decor.  So I decided to cover them with some matching fabrics and add some lovely pillows from Bed, Bath & Beyond (I used my Cricut to add some customization on the white pillows)  Stay tune for more holiday projects with my Cricut and these pillows!
 
I love having a quiet place to read or meditate and reflect.  These first two rooms are so important to me for centering and focusing my life before heading off to my busy and sometimes chaotic life.  So of course I had to get them done first.  It's been a year since we have moved into our new home and I am really enjoying the journey of making each room the special places we envision and taking time to find just the right details to make each place uniquely ours.
Thanks for letting me share-hope this inspires you to find those special items that make the rooms in your home special to you!

Saturday, October 27, 2012

Guest Designer Paula Sanders


I want to share an AWESOME project that my friend and fellow Cricut designer Paula Sanders shared with me recently.
This wonderful Halloween Scene using the Cricut: Paper Doll Dress Up Cartridge and Graphic45 halloween papers is just so perfect.  What a great way to decorate your home this Spooky time of year!
The really amazing thing about this piece is the construction....while you may think it looks like just another version of a wood shadow box....or even a pre-made wood kit...it is actually neither of those materials.  She created this house scene with different sized compartments from Foam Core Board. I just love her creativity an skill at making this piece look like wood. She carefully cut her frame & panels to make each cubby.
She used her Cricut shapes to add dimension and depth and really created a WOW piece!
Thanks Paula for sharing this with us...I know some friends that will really love it!

Monday, October 8, 2012

Canvas Corp. Blog Hop

Welcome to the Creative Cutter Room featuring Canvas Corp Blog Hop

We are so happy that you are joining us today! Each of the Creative Cutter Room design team members will be showing off some amazing projects using Canvas Corp products. Did you know that Hobby Lobby carries Canvas Corp products? Hint hint!! You may want to pick some up because we will be hosting a Canvas Corp challenge soon!

You should have reached me from Diana's site.  

Make a stop at each of the Creative Cutter Room Design Team member's blog, leave a comment on each, then head over to the Canvas Corp Facebook page and leave them the following comment: 
" I just hopped along with the Creative Cutter Room Canvas Corp Blog Hop!" 

Now lets get hopping....
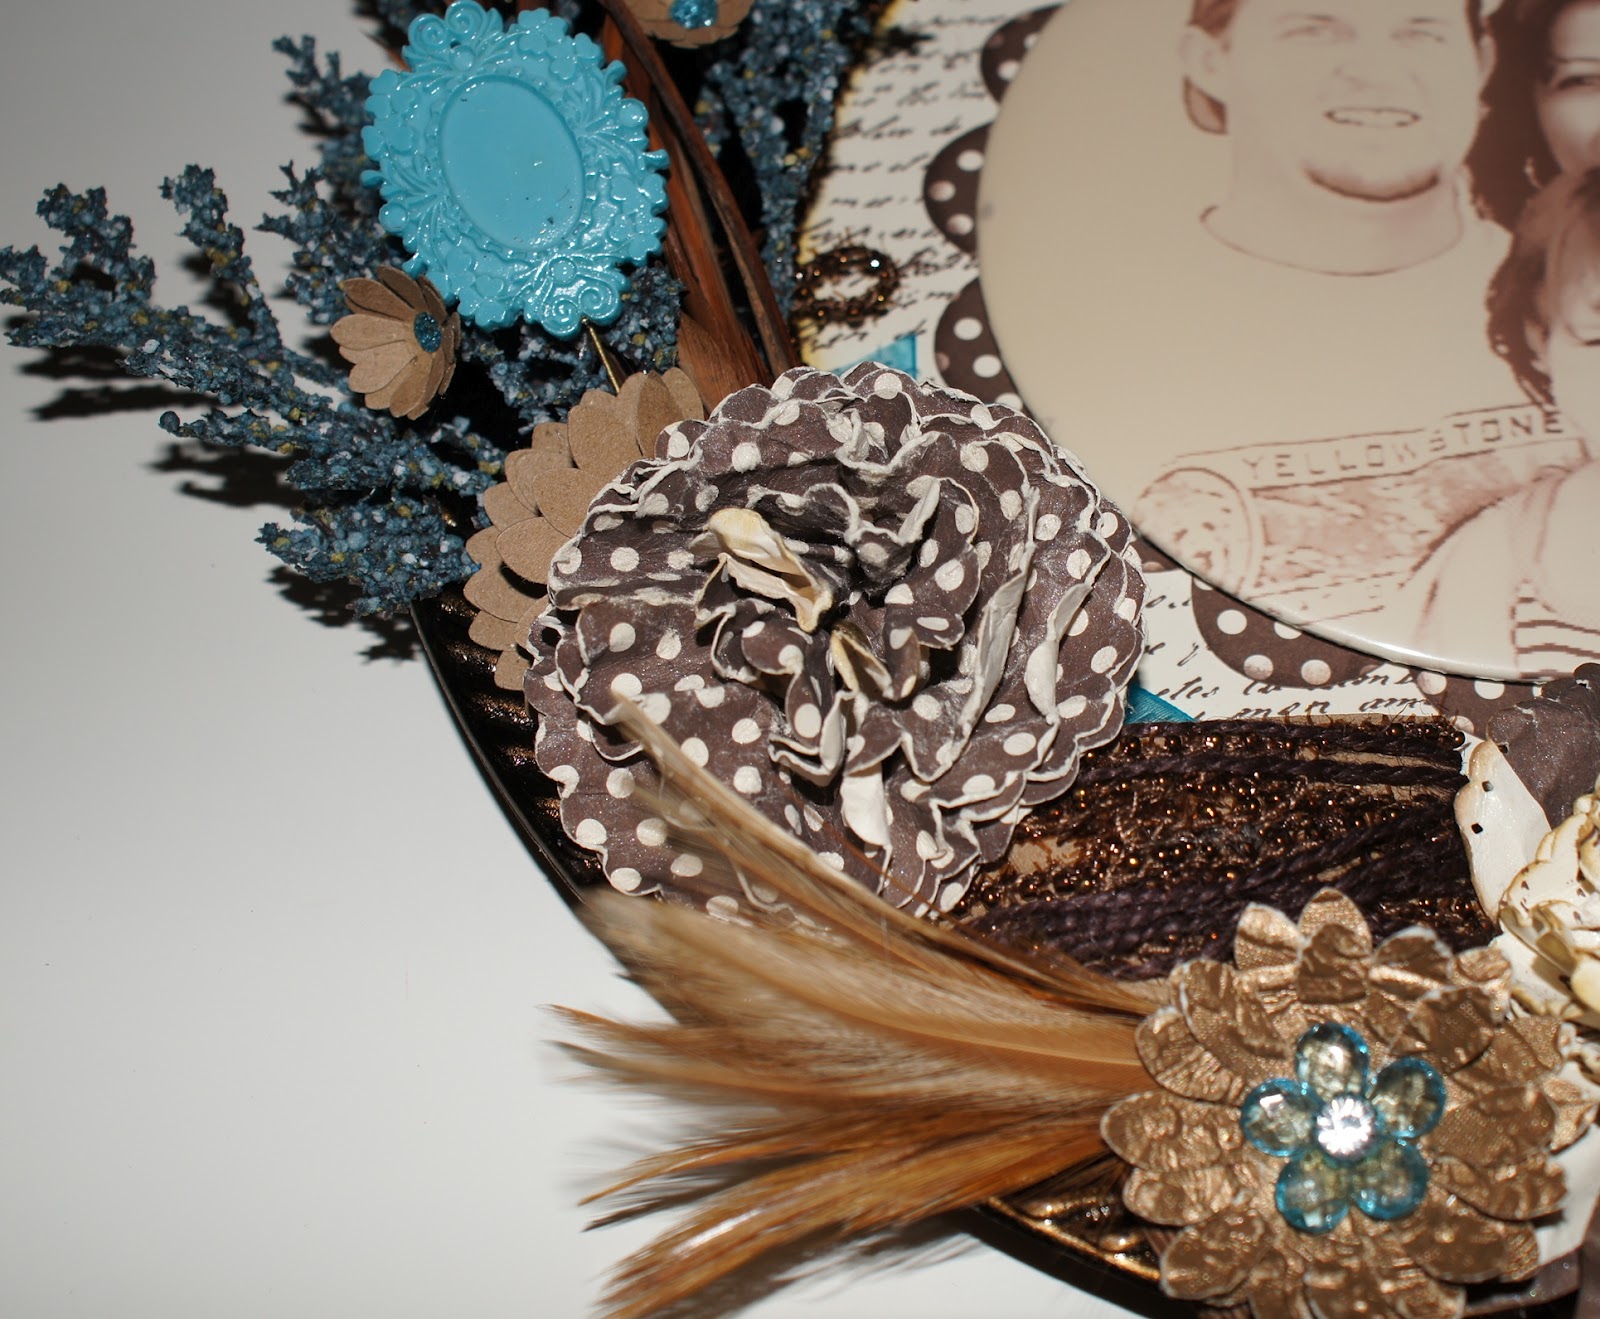
I took a plain brown plate I purchased from Hobby Lobby and used the wonderful Canvas Corp Chocolate & Ivory Paper Collection to create a new home for one of my husband's favorite pictures.  I started by using my Plantin Schoolbook cartridge to cut a 8 1/4" circle that would fit in the center. 
I then cut a scalloped circle from the Storybook cartridge out of the chocolate & ivory polka dot paper to place behind the picture.  I used more of the same paper in smaller scalloped circles to create a grunge flower sprayed with glimmer mist.  The gold flower on the plate was made using Canvas Corp's gold embossed paper....this stuff is GORGEOUS!!!! I love the look, texture and weight of this paper.  Even embossed it cut beautifully on the Cricut. 
I also used 4 mini canvases and 3 pennant tags from their product line.  I cut the triangle pieces down a bit so they fit on each of the 3x3 canvases and then sprayed them with some glimmer mist to match the other jewelry dept. embellishments from my stash. I used some floral dept. accessories like a large stem and some feathers for that FALL LOOK.
My studio is heavy on the red decor so I covered one of the mini canvases in red burlap to tie it with my room.  The last step was to add letters selling "LOVE"" with the Art Nouveau cartridge.

I hope that you liked my project.....I really LOVED working with Canvas Corp!  Their paper is versatile, their card stock is the best I have found to use with your Cricut, their specialty products are unique and add so much to your Paper Projects.
Be sure and check them out they are definitely worth Buying & Trying!!!

I thought it would be fun to share some of this wonderful product with one lucky Follower, so I created a sample pack of Canvas Corp products.  All you have to do is leave a comment on this post. I will close the comments on October 15 and announce the winner that week. Winner must contact me within 1 week to claim prize.

Sorry Due to postal issues this is open to US Residents.
**One entry per person please**


Hop along, leave a comment on each blog, become a Canvas Corp Facebook fan by  leaving them the following comment:
 " I just hopped along with the Creative Cutter Room Canvas Corp Blog Hop!" 
and you could win:
The Happy Hauntings Cricut Cartridge
(case not included)
You next stop is The Canvas Corp. Facebook Page! 

The Line up:
Carri 
Tracy
Georgiana      
Diana
Cathie
Canvas Corp Facebook Page